
If you haven't been counting along at home, this is my forty-first post. The traditional gift to readers in honor of the forty-first post is to introduce a Regular Column. Well, just call me Ann Landers, because this is HOW TOesday. Punny, I know. This week? A lesson on how to create the most perfect, birdy-themed Sip and See in the history of the world. It's okay for me to brag because I was only a co-host of this marvelous shower, so all the great ideas and decorations came from my co-hosts, and all the mistakes (including forgetting the invitation that we intended to frame at home) came from me. Here we go!

Now, just call me Prissy, because I don't know nothin' bout birthin' no babies. So the first step is to pick friends upon whom you can rely to have some cute ones. Seven ago, I picked out my friend Meghan for this very reason. You may remember Meghan from giving birth to my favorite three-and-a-half-year-old, Hadley. Well, she has been at it again, this time naming the little one …

In this case, Meghan had already birthed her baby, so we threw a "sip and see" where we sipped champagne and saw the baby. I highly recommend this option, because even the mommy got to have some champagne.
Step Two: If you find yourself surrounded by friends giving birth, may I suggest investing in some Martha Stewart paper punching tools. I found the one used to make the above banner at Michael's and used a 50% off coupon, so I truly couldn't afford not to buy it. That's what I told Evan, anyway. I don't think he was listening.
Step Three: Pick a theme and stick to it. We chose to put a bird on it, because birdies are adorable.


Please note the bird cages and birdies holding up the tassel banner. I'm sure all of our guests immediately recognized the theme for the party. If you want to have a tassel banner without spending enough money on etsy to buy your own baby on the black market, consider this tutorial that I found on Pinterest. I guarantee that the process is both easy and really fun for cats to watch/assist.
Step Four: Whip up some delicious food and drink, but only if everything on the menu is the same color. Try not to stress out too much when the cute paper straws you find do not match the shade of the ribbons you use to tie around the mason jar cups, and when the yellow of the lemonade mix does not precisely match the yellow paper flags you tape on the straws. [Courtney!] Life will probably go on.
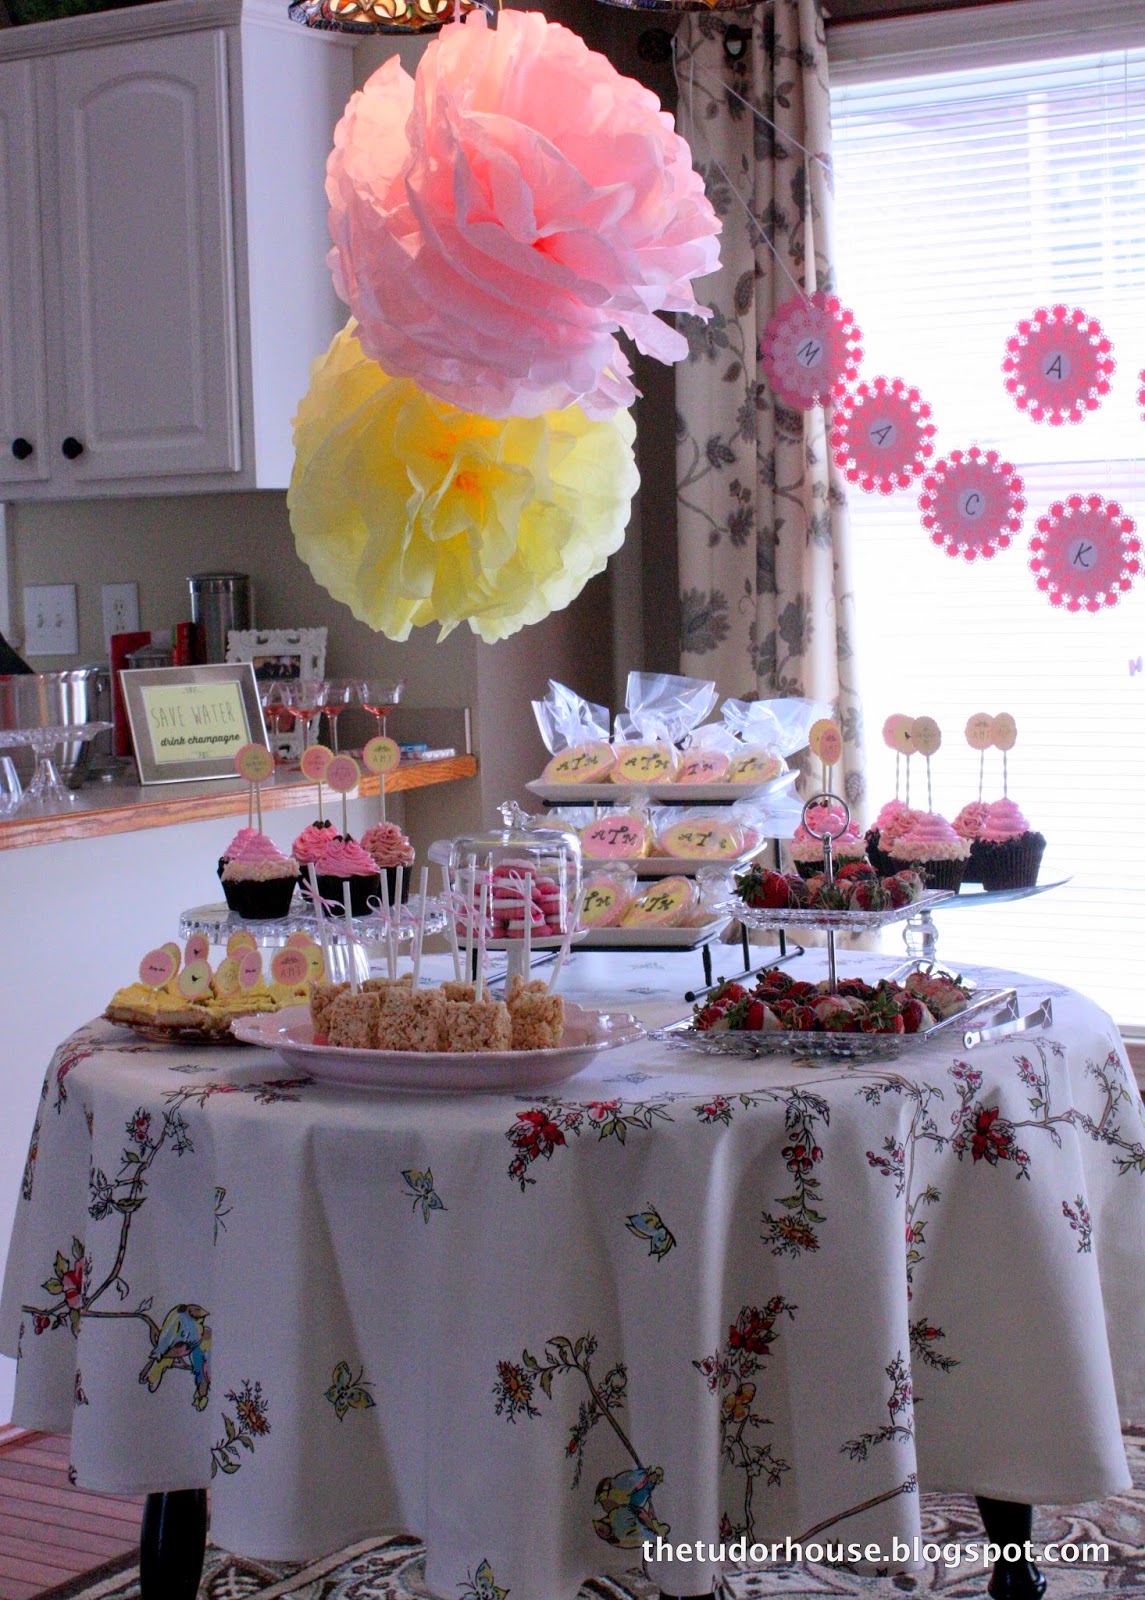

photo credit: Anna "Girard" Liebowitz
I really wish I could take credit for these cookies. It blows my mind that Anna's friend made these by hand. Tune in next HOW TOesday to read Anna's guest post on how to find a friend with such skills.


See instructions for this tasty treat below, found on Pinterest in the dreaded photo with no instructions. Keep in mind that Rice Krispie Treats are incredibly lazy when they get to room temperature and will not necessarily stand up straight for the entire party. But they do look cute for a quick photo op.


Please take a moment to appreciate the fact that my co-host Courtney (co-winner of the inaugural Queen's Cup, in case you forgot) was able to function given the varying shades of pink and yellow seen above. We weren't sure that she'd come out alive.


photo credit: Anna "Girard" Liebowitz
These two brides-babies (Babies of my bridesmaids? Is that a thing?) were born three days apart. I like to believe that my wedding inspired their birth. That's Max Jr. on the left and Ava on the right. As you can see by Max trying to play coy, they are already madly in love and all the readers of my blog will be invited to their wedding sometime in 2039. Right, Meghan? It's okay, I think there are only about 5.
Well, now that I write this post and share all these pictures, I am starting to think the point of this post was not, in fact, to teach you how to do anything but to show off these pretty pictures. Thanks for sticking with me. In exchange for your attention, I'd like to share my best tips for Rice Krispies on a Stick:
First, make a DOUBLE BATCH of Rice Krispies. I only made a single batch and ended up with odd-shaped rectangles that did not hold up to sitting on display. You can choose to add a few drops of red food coloring to the marshmallow mix as you heat it up if you'd like to double up on your pink. I was terrified that Courtney would murder me if I brought too many different shades to the party, plus Evan lost all of our food coloring after he insisted on dying our chili con queso green at his family's St. Patrick's Day party, so I restrained myself.
I'm sure you know how to make Rice Krispies, but in case you're like me and your mother would only make the healthy version with peanut butter instead of marshmallows when you were little, here's the quick how-to:
Gather your ingredients/supplies:
8 T butter
20 oz mini-marshmallows
2 t vanilla
12 C rice krispies
1 package melting candy (I got it at Michael's)
1 package cake ball sticks
1 spool tiny pink ribbon
Heat the butter and marshmallows over low heat in a large saucepan. Keep your phone nearby so you can browse Facebook while the stuff melts, because it takes forever. Remove from heat, add vanilla, and then stir in the cereal. Press into a greased 9x13 baking pan. This will seem very full, but that's a good thing. Also a good thing are straight edges, so if you have some kind of boxy baking pan, use that instead of one with curvy edges. Let your treats cool.
This is where it gets tricky. NOT. (Don't see a lot of "NOT" these days, do you?) Cut the treats into squares - about as wide as the pan is deep. Stick a cake stick into each. Melt the candy, dip each treat in and set it on wax paper to cool. After they're cool, tie a tiny bow on each stick, line them up on a cute platter, and sit back and let people think this process was really hard.
I'll be back next HOW TOesday with tips on something new. Stay tuned.
No comments:
Post a Comment